There’s something undeniably magical about the union of crisp, juicy apples and rich, velvety chocolate. Imagine sinking your teeth into a fresh apple bite, only to be met with a luscious coating of silky chocolate that melts slowly on your tongue-a delightful contrast of flavors and textures that feels like a mini celebration in every mouthful. If you’ve ever wanted to create this indulgent treat at home without the fuss of baking or complex steps, you’re in the right place. Welcome to the world of no-bake delights, where simplicity meets decadence in the easiest chocolate-covered apple recipe you’ll ever try. Whether for a spontaneous snack or a festive occasion,this guide will take you through how to transform ordinary apples into irresistible confections with just a handful of ingredients and zero oven time. Ready to dip into deliciousness? Let’s get started!
No-Bake Delight: Easy Recipe for Chocolate-Covered Apples brings together the crisp freshness of perfectly chosen apples with the luscious smoothness of chocolate, creating an irresistible treat that’s as fun to make as it is to eat. This timeless combination enchants both kids and adults alike, making it a go-to for festive occasions, casual parties, or a simple after-dinner indulgence. Whether it’s a cozy autumn afternoon or a spontaneous sweet craving, mastering this recipe will elevate your snack game instantly.
Prep and Cook Time
- Preparation: 15 minutes
- Chocolate setting: 30 minutes
- Total time: 45 minutes
Yield
Serves 6 tasty chocolate-covered apples
Difficulty Level
Easy – perfect for beginners and seasoned home chefs alike
Ingredients
- 6 medium apples (Granny Smith or Fuji recommended, washed and thoroughly dried)
- 10 oz. high-quality semi-sweet chocolate, chopped or chips
- 2 teaspoons coconut oil (for shine and smooth texture)
- Wooden sticks or skewers
- Creative toppings: crushed nuts (almonds, pistachios), colorful sprinkles, shredded coconut, or sea salt flakes
Choosing the Perfect Apples for a Crisp and Juicy Treat
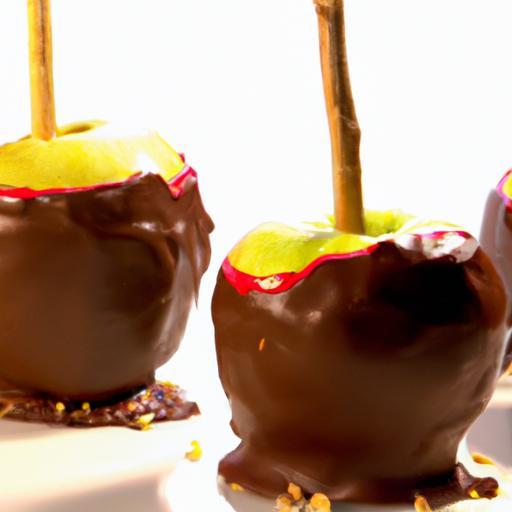
Start by selecting apples that offer a firm texture and a balance of tartness and sweetness, crucial for a refreshing bite that contrasts beautifully with rich chocolate. Granny Smith apples are a classic choice – their tartness cuts through the sweetness, creating a harmonious flavor profile. Alternatively, Fuji or Honeycrisp apples provide a sweeter, juicier option if you prefer a softer sweetness. Always rinse and dry your apples thoroughly; any moisture on the skin will prevent the chocolate from adhering properly, so this step is essential for a flawless finish.
mastering the Chocolate Coating for a Smooth and Glossy Finish
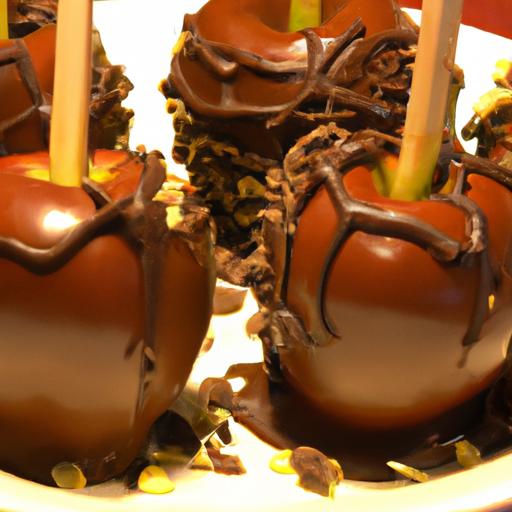
melting chocolate gently is key to a glossy, decadent coating that encases your apples perfectly. Use a double boiler or microwave in short bursts, stirring frequently to prevent burning. Adding 2 teaspoons of coconut oil helps thin the chocolate slightly, enhancing its sheen and making dipping easier. Once melted, dip the apples swiftly but carefully – holding the apple by the wooden stick, twirl it to coat evenly. allow excess chocolate to drip off before setting them on parchment paper. For best results, don’t rush the chocolate’s cooling process; let it set at room temperature or lightly chilled for about 30 minutes until firm.
Creative Toppings to Elevate your chocolate-Covered Apples
Adding toppings not only creates a stunning visual appeal but also introduces exciting textures and flavors. While the chocolate is still wet, sprinkle chopped nuts for crunch, or shower with vibrant sprinkles for a festive look.Shredded coconut adds a tropical twist,and a pinch of flaky sea salt can amplify the chocolate’s richness,balancing sweetness with a savory note. Don’t be afraid to get creative-try crushed pretzels,edible glitter,or drizzles of white chocolate for an elegant contrast. Layer toppings for a multifaceted appearance and taste experience.
Tips for storing and Serving Your No-Bake Delight
Once your chocolate-covered apples are set, store them in a cool, dry place to maintain freshness and prevent sweating. Avoid refrigeration unless your environment is very warm, as moisture can cause the chocolate to bloom, dulling the finish. If refrigerated, allow apples to return to room temperature before serving to enjoy the best texture. Serve your no-bake delight on a platter lined with parchment paper or a decorative tray. For extra flair,garnish with fresh mint leaves or edible flowers to emphasize the natural appeal. Ideal for gifting or parties, wrapping individual apples in cellophane with a colorful ribbon transforms this simple treat into a charming gift.
Step-by-Step instructions
- Prepare the apples: Wash and dry each apple thoroughly. Insert wooden sticks firmly into the center of the stem end.
- Melt the chocolate: In a double boiler or microwave-safe bowl, melt the chocolate with coconut oil in 20-second intervals, stirring well until silky and smooth.
- Dip the apples: Holding by the stick, dip each apple into the melted chocolate, rotating to coat evenly. let excess drip off.
- Add toppings: Immediately sprinkle your chosen toppings over the wet chocolate to ensure they stick.
- Set aside to harden: Place coated apples on parchment paper and let chill at room temperature or in the fridge until chocolate is firm (about 30 minutes).
- Serve and enjoy: Present them on a decorative tray or wrap individually for gifting.
Chef’s Notes
- Use room temperature apples to avoid condensation that can ruin the chocolate coating.
- For a faster set,briefly place apples in the fridge,but avoid extended refrigeration to prevent chocolate bloom.
- Experiment with dark, milk, or white chocolate for varied flavor profiles.
- Consider swirling two types of melted chocolate for a marbled affect.
- Make ahead up to 24 hours; store in an airtight container at room temperature.
Serving Suggestions
Serve these chocolate-covered apples with warm spiced cider or cold sparkling water with a twist of lemon for a refreshing balance. Complement with small bowls of extra toppings for guests to customize their own bites. Pair with a simple scoop of vanilla ice cream or a drizzle of caramel for decadent dessert options. Display your no-bake delight on a rustic wooden board accented with autumn leaves or colorful serviettes to enhance the inviting presentation.

| Nutritional Data (per apple) | Calories | Protein | Carbs | Fat |
|---|---|---|---|---|
| Chocolate-Covered Apple | 210 kcal | 1.5 g | 35 g | 8 g |
For more creative no-bake treat ideas, check out our No-Bake Dessert Ideas collection. To dive deeper into the science of chocolate tempering, visit Specialty coffee Association Research.
Q&A
Q&A: No-Bake Delight – Easy Recipe for Chocolate-Covered Apples
Q1: What makes chocolate-covered apples a perfect no-bake treat?
A1: chocolate-covered apples take the best of both worlds: the crisp, juicy freshness of apples combined with the rich, velvety sweetness of chocolate. They require zero oven time, meaning you can whip up a decadent dessert in minutes without heating up your kitchen. Plus,they’re a fun,hands-on treat to customize with toppings and perfect for all ages!
Q2: which type of apples works best for this recipe?
A2: Crunchy and tart apples like Granny Smith are ideal as their tangy flavor balances the sweetness of chocolate beautifully.Though, if you prefer sweeter bites, Fuji or honeycrisp apples also work wonderfully. The key is choosing apples firm enough to hold their shape when dipped.
Q3: What kind of chocolate should I use for coating?
A3: Use high-quality chocolate chips or bars-dark, milk, or even white chocolate, depending on your taste preference. For the smoothest coating, melt the chocolate slowly over a double boiler or in short bursts in the microwave, stirring regularly to avoid clumps and burning.
Q4: Can I add toppings to my chocolate-covered apples?
A4: Absolutely! After dipping your apple slices, sprinkle on chopped nuts, shredded coconut, crushed cookies, or colorful sprinkles before the chocolate sets. The toppings add an extra layer of texture and flavor,elevating your no-bake delight into a festive treat.
Q5: How long does it take for the chocolate to set, and how should I store the apples?
A5: Once dipped and topped, place the apples on parchment paper in the refrigerator for about 20-30 minutes to let the chocolate fully harden. Store the finished apples in an airtight container in the fridge and enjoy within 2-3 days for the freshest taste and crunch.
Q6: Can this recipe be adapted for parties or gift-giving?
A6: Definitely! Chocolate-covered apples are visually stunning and make charming edible gifts.Arrange them on decorative trays or wrap individual apples in cellophane with a ribbon. For parties,set up a “DIY dipping station” so guests can customize their own no-bake delights-it’s interactive entertainment and dessert in one!
Q7: What if I want to keep this treat healthier?
A7: Opt for dark chocolate with at least 70% cocoa content-it contains less sugar and has antioxidant benefits.Skip heavy toppings and choose natural ones like chopped almonds or dried fruit. Remember, the natural sweetness and crunch of apples already make this a healthful indulgence with a homemade touch!
Enjoy these luscious chocolate-covered apples anytime you crave a quick, no-bake treat that’s as fun to make as it is to eat!
Closing Remarks
With just a handful of simple ingredients and no oven required, these chocolate-covered apples transform an everyday fruit into a luscious, crowd-pleasing treat. Whether you’re crafting a quick snack for yourself or preparing a festive platter for friends and family, this no-bake delight proves that the sweetest pleasures don’t have to be complicated. So next time you crave a bite of chocolatey goodness with a crisp, refreshing twist, remember: the perfect dessert is just a dip and a chill away.Happy dipping!