There’s something undeniably enchanting about the crisp crunch of a fresh apple paired with the rich, velvety embrace of chocolate. Now, imagine combining these two beloved treats without ever turning on your oven. Welcome to our Irresistible No-Bake Chocolate Covered Apples Recipe Guide-a delightful journey that transforms simple apples into decadent confections with minimal effort and maximum flavor. Whether you’re craving a rapid snack, preparing a festive treat, or looking to impress guests with ease, this guide unwraps the secrets to creating luscious, glossy chocolate-covered apples that are as fun to make as they are to eat. Get ready to dip, drizzle, and indulge in sweet simplicity like never before!
Irresistible no-bake chocolate covered apples recipe guide brings together the perfect harmony of crisp, juicy apples and a silky, indulgent chocolate coating that’s as delightful to make as it is indeed to eat. Whether you’re crafting these as an elegant party treat or a fun family activity, mastering the ideal apple selection, expertly melting chocolate, and layering creative toppings will elevate these classic confections to show-stopping results.
Prep and Cook Time
- Readiness: 15 minutes
- Chilling/setting: 20 minutes
- Total Time: 35 minutes
Yield
serves 8 beautifully coated chocolate-covered apples
Difficulty Level
Easy – perfect for all skill levels
Ingredients
- 8 medium-sized apples (choose crisp varieties like honeycrisp or Granny Smith)
- 12 ounces high-quality dark or semi-sweet chocolate chips (or chopped baking chocolate)
- 1 teaspoon coconut oil (optional, for smoother chocolate texture)
- 8 wooden skewers or popsicle sticks
- 1 cup finely chopped nuts (pecans, almonds, or walnuts)
- 1 cup colorful sprinkles (optional)
- ½ cup shredded coconut (unsweetened or toasted)
- Sea salt flakes (for finishing)
- Wax paper (for lining trays)
Instructions
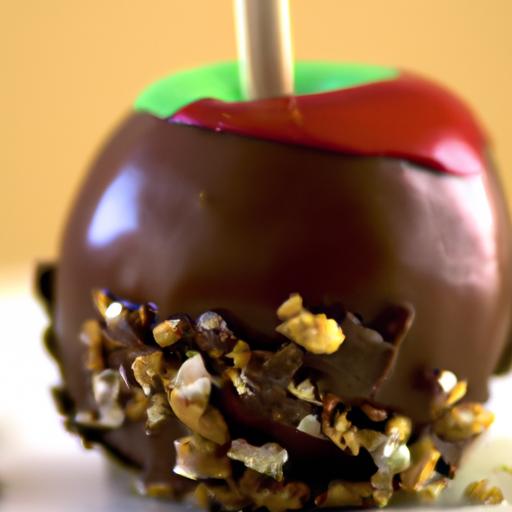
- Selecting apples: Thoroughly wash and dry each apple, then insert a wooden skewer firmly into the stem end, ensuring a snug grip to avoid slipping later. Opt for crisp apples like Honeycrisp or Granny smith that deliver a satisfying crunch and bold flavor contrast to the rich chocolate.
- Melting and Tempering Chocolate: Place the chocolate chips in a microwave-safe bowl, add coconut oil if using, and microwave in 30-second bursts, stirring thoroughly each time until smooth and silky. Alternatively, use a double boiler on low heat to gently melt the chocolate, stirring continuously to prevent scorching. This gentle tempering technique ensures a shiny finish and a satisfying snap when bitten.
- Prepping the Toppings: Place all toppings-nuts, sprinkles, shredded coconut, and sea salt-in shallow dishes for easy dipping or sprinkling. Arrange a tray lined with wax paper for resting the coated apples.
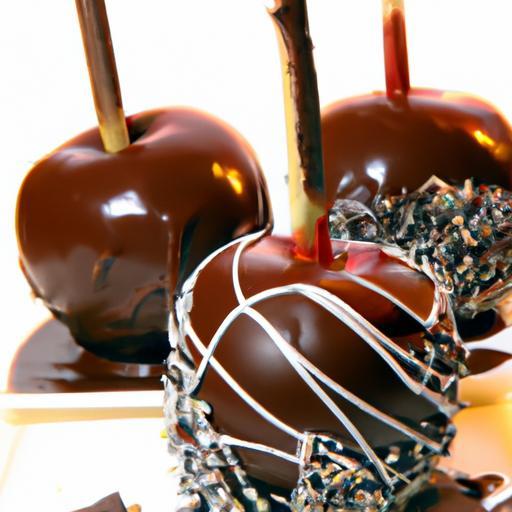
- Dipping the Apples: Holding the skewer, dip each apple into the melted chocolate, turning slowly to coat evenly. Lift and allow excess chocolate to drip back into the bowl for a smooth finish. Promptly roll or sprinkle your choice of toppings over the chocolate before it sets.
- Setting: Place the dipped apples upright on the wax paper-lined tray. If needed, stabilize them by balancing the skewer on the edge of a glass or small bowl to keep the coating flawless.
- Cooling: refrigerate the apples for at least 20 minutes or until the chocolate hardens entirely. This step locks in the glossy, crackling shell that’s essential to the irresistible no-bake chocolate covered apples recipe guide experience.
Tips for Success
- use room-temperature apples to prevent condensation under the chocolate, which can cause slipping or dull finishes.
- If your chocolate seizes or becomes grainy, stir in a teaspoon of warm heavy cream or coconut oil to restore smoothness.
- Experiment with white chocolate or colorful candy melts for festive variations, but temper accordingly for best texture.
- Make-ahead: Keep chocolate coated apples refrigerated and consume within 2 days for optimal freshness and crunch.
- For an extra crunch, press crushed pretzels or toffee bits onto the chocolate before setting.
Serving Suggestions
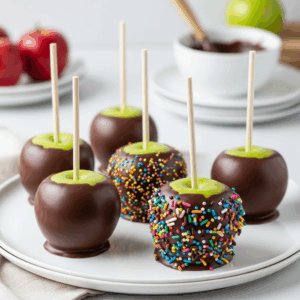
Present your chocolate-covered apples on a rustic wooden tray garnished with fresh autumn leaves or edible flowers for seasonal charm. Pair with a warm spiced cider or a glass of sparkling wine to balance sweetness with subtle acidity. For an exciting sweet-salty twist, add a light dusting of flaky sea salt just before serving.

| Nutrient | Per Serving (1 apple) |
|---|---|
| Calories | 220 kcal |
| Protein | 2 g |
| Carbohydrates | 32 g |
| fat | 10 g |
For more inspiration on crafting delightful no-bake treats, check out our Easy No-Bake Desserts Collection. Learn more about the art and science of tempering chocolate at Chocolate Alchemy.
Q&A
Q&A: Your Ultimate Guide to Irresistible No-Bake Chocolate Covered Apples
Q1: What makes this no-bake chocolate covered apples recipe so irresistible?
A1: The magic lies in its simplicity and harmony of flavors. Crisp, juicy apples meet a luscious, silky chocolate coating-no oven required! This fusion creates a treat that’s both refreshing and decadently sweet, perfect for any season or occasion.
Q2: Which type of apples work best for chocolate covered apples?
A2: For the perfect balance, opt for firm, slightly tart varieties like Granny Smith, Honeycrisp, or Fuji. Their natural crispness cuts through the richness of the chocolate, giving each bite a delightful contrast.
Q3: How do you ensure the chocolate coating sticks to the apples without baking?
A3: Dry the apples thoroughly and chill them before dipping-this prevents melting and slipping. Use tempered chocolate or melt high-quality chocolate chips gently, then dip quickly, letting excess drip off before placing them on parchment. A sprinkle of crushed nuts or sprinkles before setting helps the coating cling even better!
Q4: Can I customize the toppings without baking?
A4: Absolutely! The no-bake method shines here. Experiment with crushed pretzels, toasted coconut, colorful sprinkles, sea salt flakes, or even drizzle white chocolate for an artful finish. The toppings stick beautifully when sprinkled immediately after dipping.
Q5: How long do no-bake chocolate covered apples last, and how should I store them?
A5: For best taste and texture, enjoy them within 24-48 hours. Store in the refrigerator on a parchment-lined tray, loosely covered with plastic wrap. Let them return to room temperature briefly before serving for the perfect melt-in-your-mouth experience.
Q6: Is this recipe kid-pleasant and grate for parties?
A6: Definitely! No baking means less fuss and mess-kids love dipping their own apples and decorating with fun toppings. It’s a fantastic hands-on activity for parties, classroom treats, or holiday gatherings that doubles as a conversation starter.
Q7: Can I make these chocolate covered apples vegan or dairy-free?
A7: Yes! Use dairy-free dark or vegan chocolate, and check that toppings are free from animal products. This no-bake approach easily adapts to various dietary preferences without sacrificing flavor or texture.
Q8: Any expert tips to elevate this recipe?
A8: For an irresistible twist, add a dash of cinnamon or chili powder to the melted chocolate before dipping, creating a spicy-sweet depth. also, chilling the dipped apples on a wire rack rather then flat surface helps keep the coating flawless and avoids sogginess. Ready to dive into this no-bake chocolate covered apple adventure? Grab your apples, melt that chocolate, and prepare for a luscious treat that’s as fun to make as it is indeed to eat!
Final Thoughts
With every bite of these irresistible no-bake chocolate-covered apples, you’re not just enjoying a dessert-you’re indulging in a delightful fusion of crisp, juicy fruit and smooth, decadent chocolate that’s as easy to make as it is satisfying. Whether you’re crafting them for a festive gathering, a quick treat, or a thoughtful gift, this guide ensures you’ll impress without breaking a sweat. So grab your favorite apples, melt that chocolate, and let creativity take the lead-because sometimes, the simplest recipes bring the sweetest moments. Happy dipping!