There’s something irresistibly charming about bite-sized foods-they invite you to savor a burst of flavor in just one delightful mouthful. Enter the world of DIY sandwich skewers: a playful twist on a classic favorite that transforms ordinary sandwiches into eye-catching, portable bites perfect for any occasion. Whether you’re hosting a casual gathering, packing a creative lunch, or simply craving a fun snack, these miniature bread creations are as versatile as they are tasty. In this article, we’ll explore how to craft your own sandwich skewers, blending flavors, textures, and visual appeal to elevate your culinary creativity one skewer at a time.
Crafting DIY Sandwich Skewers: Bite-Sized Bread Creations
Crafting DIY sandwich skewers: bite-sized bread creations open a world of flavorful possibilities, transforming ordinary sandwiches into playful, elegant finger foods. These miniature delights combine vibrant ingredients with carefully selected breads, offering a balance of taste, texture, and visual appeal perfect for entertaining or casual snacking.
Prep and Cook Time
- Preparation Time: 20 minutes
- Cook Time: 10 minutes (optional toasting/grilling)
- Total Time: 30 minutes
Yield
Approximately 12 sandwich skewers (serves 4 as appetizers)
Difficulty Level
Easy to medium - perfect for both beginners and those looking to refine presentation skills.
Ingredients
- 12 small slices of sourdough bread, crusts removed and cut into 1½ inch squares
- 6 slices of smoked turkey, halved
- 6 slices of sharp cheddar cheese, cut into 1-inch cubes
- 12 cherry tomatoes, halved
- 1/2 cup cucumber, thinly sliced
- 1/4 cup basil leaves, fresh
- 2 tablespoons mayonnaise mixed with 1 teaspoon Dijon mustard
- 12 wooden skewers, 6 inches long
- Salt and freshly ground black pepper, to taste
- Olive oil for light brushing (optional)
Choosing the Perfect Ingredients for Flavorful Sandwich Skewers
When crafting DIY sandwich skewers: bite-sized bread creations, the magic begins with selecting the freshest and most complementary ingredients. Opt for breads that are sturdy enough to hold fillings without becoming soggy, like sourdough or multigrain. Balance savory components such as smoked turkey with fresh, crisp vegetables like cucumber and sweet bursts from cherry tomatoes. Don’t hesitate to incorporate fresh herbs-basil or dill injects brightness and an aromatic punch that elevates every bite.
Mastering the Art of Bite-Sized Bread Selection and Preparation
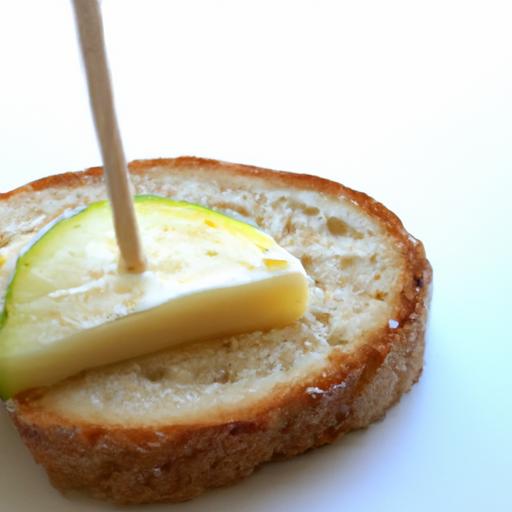
Bite-sized breads are the canvas of these skewers. Choosing the right texture is crucial: a dense crumb holds layers securely, while a fluffy interior provides contrast. Slice bread evenly into small squares or rounds about 1½ inches across for ideal bite-size portions. To prevent sogginess, lightly toast or brush with olive oil and warm briefly on a grill or skillet. This step adds crunch and a golden hue that amplifies visual appeal and flavor depth.
Creative Layering Techniques to Elevate Your Sandwich skewers
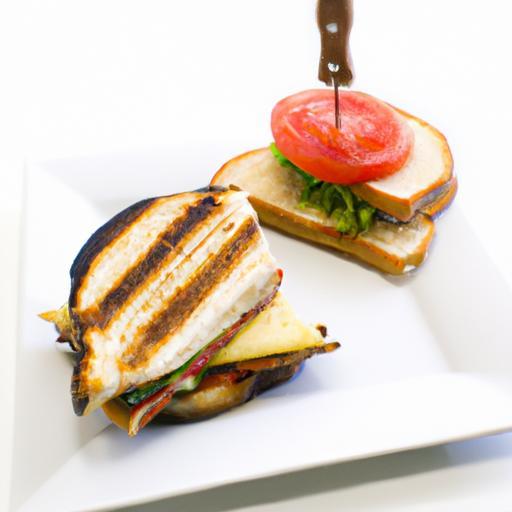
Layering is where creativity shines. Start with a smear of your mayonnaise-mustard blend on the bread to add moisture and tang. Alternate between textures-bread, turkey, cheese, fresh cucumber, and a basil leaf create a medley of flavors that burst in your mouth. Stack vertically on the skewer gently but firmly, piercing through all layers. This not only secures the ingredients but also provides an attractive cross-section glimpse of colorful layers, enticing every guest.
Presentation Tips to Make Your DIY Skewers Irresistible and Fun
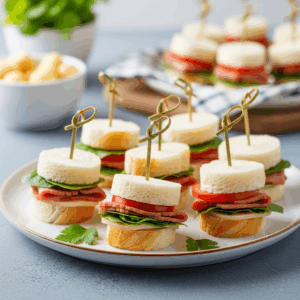
To captivate eyes and appetites, arrange the sandwich skewers on a rustic wooden board or a radiant, patterned platter. Garnish with sprigs of fresh herbs, a dusting of sea salt, or a drizzle of balsamic reduction for sophistication. Serve with a small bowl of dipping sauce-think honey mustard or herb aioli on the side-to engage guests interactively. For an extra visual pop, alternate different bread types and colorful vegetables on each skewer for a vibrant, playful display.
Instructions
- Prepare the bread: Remove crusts from sourdough slices and cut into uniform 1½-inch squares. Lightly brush each piece with olive oil and toast on a grill pan over medium heat until golden, about 2 minutes per side. Let cool.
- Mix the spread: Combine mayonnaise and Dijon mustard in a small bowl. Spread a thin layer on one side of each toasted bread square.
- Layer ingredients: On each bread square, place a basil leaf, a folded half slice of smoked turkey, a cheddar cube, a cucumber slice, and finish with a halved cherry tomato. Season lightly with salt and pepper.
- Assemble skewers: Thread each skewer carefully through all layers starting from the bread base. Ensure ingredients are snug but not squashed.
- Optional finishing touches: Arrange skewers on a serving platter. For a warm variation, grill assembled skewers for 2 minutes total, turning slowly to melt cheese slightly.
Tips for Success
- Variations: Substitute smoked turkey with prosciutto or roasted veggies for vegetarian options.
- Make-ahead: Prepare fillings and toast bread up to 4 hours ahead; assemble just before serving for freshness.
- Prevent sogginess: Always toast breads and use a thin spread of moisture-rich condiments to maintain texture.
- ingredient swaps: Try pepper jack cheese or fresh mozzarella for different flavor profiles.
- Serving note: Use sturdy bamboo skewers for a more eco-friendly and stylish presentation.
Serving Suggestions
Present sandwich skewers with a refreshing side of chilled sparkling water infused with lemon and mint. For an upscale touch, offer a trio of dipping sauces like pesto aioli, cranberry chutney, or spicy sriracha mayo. Decorate the platter with edible flowers or microgreens to enhance visual appeal and invite guests to indulge in this array of handheld gourmet bites.
| Nutrient | Per Serving (3 Skewers) |
|---|---|
| Calories | 220 kcal |
| Protein | 14 g |
| Carbohydrates | 15 g |
| Fat | 11 g |

For more innovative finger food ideas, check out our Creative Mini appetizers post. To dive deeper into the history and varieties of bread ideal for skewers, explore this extensive guide from BreadWorld.
Q&A
Q&A: Crafting DIY Sandwich Skewers: Bite-Sized Bread Creations
Q1: What exactly are sandwich skewers?
A1: Sandwich skewers are miniature, bite-sized sandwiches threaded onto small sticks or toothpicks, perfect for parties, picnics, or snack platters. They combine the familiar comfort of a sandwich with the fun, portable twist of a skewer-think of them as edible art on a stick!
Q2: why choose sandwich skewers over traditional sandwiches?
A2: These little beauties pack big flavor in a perfect-sized portion, making them easy to eat with your hands and impractical to resist. They’re visually appealing, versatile, and a great way to get creative with ingredients-plus, they’re fantastic for serving crowds without the mess.
Q3: What types of bread work best for sandwich skewers?
A3: Choose breads that hold their shape well, like sliced baguette, ciabatta, or sturdy sandwich bread cut into small squares or rounds. Mini bagels or pita pockets also make excellent bases. Avoid overly soft or crumbly bread that might fall apart when skewered.
Q4: How can I assemble the perfect sandwich skewer?
A4: Start by selecting complementary ingredients-think layers of deli meats, cheeses, veggies, and spreads. Cut fillings into small, uniform pieces to ensure balance and ease of stacking. alternate bread and fillings on the skewer, finishing with a garnish like an olive or cherry tomato to add color and hold everything together.
Q5: Any tips for making sandwich skewers visually inviting?
A5: Yes! Play with colors and textures by mixing vibrant veggies (like red peppers or cucumbers),different cheese varieties, and herbs. Use patterned or flavored toothpicks for a touch of flair. Presentation on a sleek platter with dipping sauces adds an extra wow factor.
Q6: Can sandwich skewers cater to dietary restrictions?
A6: Absolutely! Swap traditional bread for gluten-free or whole grain options, use plant-based spreads and proteins for vegan guests, or create low-carb versions with lettuce wraps instead of bread. The skewer format makes customization simple and stylish.
Q7: How long can DIY sandwich skewers be stored?
A7: For the freshest taste and texture, assemble skewers shortly before serving. If prepping ahead, store components separately in airtight containers and put the skewers together just before guests arrive to avoid sogginess or wilting.
Q8: What occasions are perfect for serving sandwich skewers?
A8: These bite-sized delights shine at casual gatherings, cocktail parties, baby showers, and holiday buffets. They’re great finger foods that encourage mingling and tasting, making any event more interactive and appetizing.
Q9: Any creative ingredient combos to try?
A9: Think beyond the classic ham and cheese! Try caprese skewers with mozzarella, basil, cherry tomato, and balsamic drizzle; smoked salmon with cream cheese and cucumber; or even dessert-inspired versions like peanut butter, banana, and honey mini sandwiches on sweet bread rounds.
Q10: Where can beginners find inspiration or recipes for sandwich skewers?
A10: Start with food blogs, YouTube channels, and socials dedicated to party foods and appetizers. Experimentation is key-mix and match flavors you love and enjoy the process of turning simple sandwiches into delightful, eye-catching creations. Happy skewering!
The Conclusion
As you embark on your own sandwich skewer adventures, remember that the magic lies in the mix-and the joy of crafting bite-sized bites that are as fun to make as they are to eat. Whether for a casual gathering or an elegant appetizer, these petite bread creations offer endless possibilities to showcase your favorite flavors in a playful, portable format. So gather your ingredients, sharpen those toothpicks, and let your creativity soar-because with DIY sandwich skewers, every bite is a mini masterpiece waiting to happen. Happy skewering!