There’s something undeniably delightful about the humble sandwich-its layers of flavors and textures tucked neatly between slices of bread. But what if you could take this classic comfort food and transform it into a visually stunning, bite-sized treat? Enter DIY sandwich skewers: a playful, versatile twist that turns your favorite sandwiches into colorful, crowd-pleasing appetizers. In this article, we’ll explore how to craft these tasty bread-board creations, blending creativity with convenience to elevate your snacking game and impress guests at your next gathering. Ready to bite into innovation? Let’s get skewering!
Crafting DIY Sandwich Skewers: A Tasty Bread-Board Twist
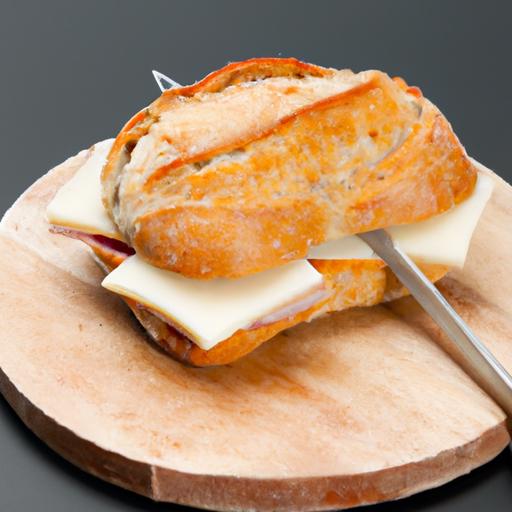
Crafting DIY sandwich skewers invites a vibrant and interactive way to enjoy classic sandwich flavors with a fresh, bite-sized appeal. Originating from the playful spirit of picnic platters and tapas-inspired appetizers, these skewers transform familiar ingredients into a colorful, layered experience that excites the palate and dazzles the eye. Whether you’re hosting a casual gathering or seeking a fun family meal, this technique unlocks endless creativity and ease in assembling tasty, texturally complex bites.
Prep and Cook Time
- Planning: 20 minutes
- assembly: 15 minutes
- Total Time: 35 minutes
Yield
Serves 6-8 (approximately 24 skewers)
Difficulty Level
Easy – Perfect for beginners and speedy entertaining
Ingredients
- 12 slices of artisanal bread (sourdough or multigrain, crusts removed)
- 150g deli turkey breast, thinly sliced
- 150g sharp cheddar cheese, cut into 1-inch cubes
- 1 cup cherry tomatoes, halved
- 1/2 cup roasted red peppers, sliced into strips
- 1/2 cucumber, sliced into thick rounds
- 1 ripe avocado, sliced
- 2 tbsp pesto sauce or flavored mayo
- Fresh basil leaves for garnish
- 24 wooden or bamboo skewers, about 6 inches long
- Salt and cracked black pepper, to taste
Instructions
- Prepare the bread base: Using a small round cookie cutter or sharp knife, cut each slice of bread into 1.5-inch squares or rounds. Lightly toast to add firmness, helping it hold layers without sogginess.
- Layer with sauces: Spread a thin layer of pesto or flavored mayo on each bread piece to enhance moisture and flavor profile. This also acts as a barrier to prevent soggy bread.
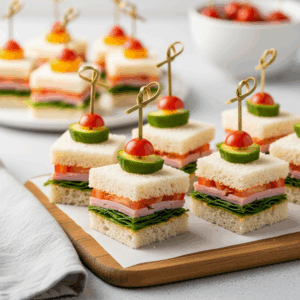
- Build a balanced stack: Start threading the skewers alternating bread, turkey, cheese cube, cucumber slice, roasted pepper strip, and cherry tomato halve
- Finish with avocado and basil: Add a delicate slice of avocado and a fresh basil leaf on top. Press gently but firmly to keep all layers together without smashing.
- Season smartly: sprinkle a pinch of salt and freshly cracked black pepper across the skewers for a burst of seasoning that ties all flavors.
- Chill before serving: Refrigerate skewers for at least 10 minutes to let flavors meld and stabilize during presentation.
- Optional glaze: Lightly brush with olive oil or a balsamic reduction for a visual sheen and subtle tang.
- Prepare your bread-board: Arrange skewers artistically on a wooden serving board-group by color or ingredient for visual impact.
Tips for Success
- Ingredient freshness is key: Use fresh bread and crisp vegetables to maintain vivid texture contrasts in every bite.
- Balancing flavors: Incorporate a mix of creamy, crunchy, and tangy ingredients to keep the palate intrigued.
- Skewer length: Opt for skewers about 6 inches long to allow easy handling and bite-sized layers.
- Make ahead: Assemble the sandwich skewers up to 2 hours before serving and keep covered in the fridge. Add avocado and basil last-minute for best freshness.
- Vegetarian alternatives: Swap turkey for grilled portobello or marinated tofu for satisfying plant-based options.
Serving Suggestions
Present the sandwich skewers on a wide wooden bread-board surrounded by small bowls of complementary dips such as hummus, honey mustard, or a zesty yogurt ranch. Garnish with microgreens or edible flowers for a pop of color. Pair with chilled sparkling water or a light rosé for a perfect casual chic vibe. Encourage guests to pick and mix without the fuss of utensils, making it a charming crowd-pleaser.

| Nutrient | Per Serving |
|---|---|
| Calories | 210 kcal |
| Protein | 12 g |
| Carbohydrates | 18 g |
| Fat | 10 g |
For more creative bread-board ideas, explore our Ultimate Charcuterie Board Guide. Curious about ingredient pairings? Learn how to balance texture and taste from Serious Eats Food Science.
Q&A
Q&A: Crafting DIY Sandwich Skewers – A Tasty bread-Board Twist
Q1: What exactly are sandwich skewers?
A1: Think of sandwich skewers as the charming hybrid between classic sandwiches and playful party bites. Instead of traditional slices stacked one on top of the other, ingredients are threaded onto skewers-creating portable, bite-sized flavor explosions that are both visually appealing and easy to enjoy.
Q2: Why consider making sandwich skewers instead of regular sandwiches?
A2: Sandwich skewers offer a fresh spin on lunchtime or party snacking. They’re customizable, crowd-pleasing, and perfect for sharing on a bread board or charcuterie spread. Plus, they’re less messy and easy to handle, making them a winner for kid’s lunches, picnics, or casual get-togethers.
Q3: What types of bread work best for sandwich skewers?
A3: As the bread acts as the base, opt for small rolls, mini pita pockets, or cubed artisan bread-something sturdy yet soft enough to absorb flavors without falling apart. Baguette slices or focaccia chunks also lend great texture and sophistication to your skewers.
Q4: How do you assemble a DIY sandwich skewer?
A4: Start by prepping all your ingredients into bite-sized pieces-think cubes of cheese, rolled deli meats, crisp veggies, and bread chunks. Thread your skewer in a colorful pattern: bread, meat, cheese, veggie, repeat. A drizzle of dressing or a spread on the bread can elevate the flavor further.
Q5: Can I make sandwich skewers suitable for dietary restrictions?
A5: Absolutely! The beauty of DIY skewers is their adaptability. For vegans, swap meats and cheeses for marinated tofu, hummus, and grilled veggies. Gluten-free bread cubes and dairy-free cheeses ensure everyone at the table can join in on the tasty fun.
Q6: What extra touches make sandwich skewers stand out?
A6: Fresh herbs like basil or mint threaded in add brightness. Pickles, olives, or cherry tomatoes introduce pops of acidity and juiciness. A sprinkle of sea salt or a dab of mustard or pesto on the bread piece can add that gourmet flair your skewers deserve.
Q7: How should sandwich skewers be served and stored?
A7: Present your skewers elegantly arranged on a bread board, surrounded by complementary dips and spreads for dipping or slathering. If not serving immediately, cover and refrigerate-but assemble shortly before eating to keep bread from becoming soggy.
Q8: Any tips for making sandwich skewers kid-pleasant?
A8: Use familiar ingredients like turkey, cheddar, and mild veggies such as cucumber or bell pepper. Incorporate fun shapes by using cookie cutters on bread or cheese slices before skewering. Let kids help build their own skewers-it’s a creative activity and an appetite booster!
Crafting DIY sandwich skewers is all about unlocking playful, portable bites that bring fun and flavor to any bread board. With a little creativity, you can turn basic sandwich ingredients into a stunning edible display perfect for sharing, snacking, and savoring. Ready to thread your way to tasty? Grab those skewers and start stacking!
Key Takeaways
Whether you’re hosting a casual get-together or simply jazzing up your everyday lunch, crafting DIY sandwich skewers offers a playful and delicious twist on traditional bread boards. With endless ingredient combinations and the freedom to customize each bite, these skewers transform simple sandwiches into bite-sized works of art. so grab your favorite breads, fillings, and a handful of skewers-because the next time hunger strikes, you’ll be ready to serve up creativity, flavor, and fun all on one stick. Happy skewering!