There’s a magic in how sugar, gelatin, and vanilla transform into fluffy clouds of sweetness that melt on the tongue. Homemade marshmallows blend science and artistry, offering nostalgic comfort and creative fun. In “Fluffy & Sweet: The Art of Homemade Marshmallows Explained,” you’ll discover the secrets, techniques, and playful flair that make these treats so rewarding to craft. Whether a novice or seasoned sweet-maker, prepare to explore a world where texture meets taste enchantingly.
Homemade Marshmallows: Irresistibly Fluffy & Sweet, The Art Explained
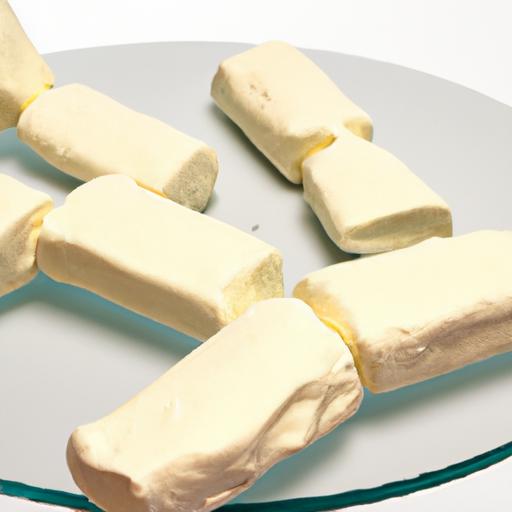
Fluffy & Sweet delights like homemade marshmallows hold a special place in many hearts. Rooted in centuries-old traditions yet delightfully modern, these pillows of sweetness charm with their melt-in-your-mouth texture and endless creative possibilities. Whether draped over hot cocoa or toasted to golden perfection, mastering the magic behind their soft, airy consistency is truly a rewarding culinary adventure.
Prep and Cook Time
Planning: 20 minutes
Cooking: 15 minutes
Cooling & Setting: 4 hours (or overnight for best results)
Yield
About 40 generous marshmallows (1½ inch squares)
Difficulty Level
Medium – Requires some precision but totally achievable with focus and patience
Ingredients
- 3 tablespoons unflavored powdered gelatin (about 3 envelopes)
- 1 cup cold water, divided
- 2 cups granulated sugar
- 1/2 cup light corn syrup
- 1/4 teaspoon salt
- 1 tablespoon pure vanilla extract
- Powdered sugar and cornstarch mix (for dusting; 1:1 ratio)
Instructions
- bloom the gelatin: In the bowl of a stand mixer, sprinkle 3 tablespoons gelatin over 1/2 cup cold water. Let it sit for 10 minutes until it becomes spongy and absorbs the liquid.
- Prepare sugar syrup: In a medium saucepan, combine granulated sugar, corn syrup, salt, and the remaining 1/2 cup water. Stir gently over medium heat until the sugar dissolves. Attach a candy thermometer and bring the mixture to a boil without stirring till it reaches 240°F (115°C), the soft-ball stage.
- Whip the mixture: Carefully pour the sugar syrup into the bloomed gelatin while the mixer runs on low speed. Onc combined, increase the speed to high and whip for 10-12 minutes until the mixture triples in volume and becomes thick, glossy, and cool enough to handle.
- Add flavor: Add 1 tablespoon vanilla extract (or any preferred flavoring) during the last minute of whipping to evenly incorporate.
- Prepare the pan: Lightly grease a 9×13-inch baking dish. dust it generously with the powdered sugar and cornstarch mix to prevent sticking.
- Set the marshmallow: Pour and spread the fluffy batter into the prepared pan, smoothing the top with a spatula dipped in water to avoid sticking. Dust the top again with the powdered sugar-cornstarch blend.
- Let it rest: Allow the marshmallows to set at room temperature for at least 4 hours or overnight for a perfectly firm yet tender texture.
- Cut and dust: Use a sharp, greased knife or kitchen scissors to cut into desired shapes. Toss the pieces lightly in more powdered sugar-cornstarch mix to prevent stickiness.
Tips for Success
- Using a stand mixer is ideal for achieving the fluffy & sweet texture, as vigorous whipping incorporates essential air bubbles.
- Do not skip blooming gelatin-it ensures a silky, stable marshmallow that holds its shape beautifully.
- Keep an eye on the candy thermometer; overshooting the soft-ball stage results in grainy marshmallows.
- For a fun twist, swap vanilla for rose water, almond extract, or even a splash of espresso.
- To color your marshmallows, add a few drops of gel food coloring during the final whipping stage-gel works best to keep the texture intact.
- For dusting alternatives, try finely ground freeze-dried fruit powders mixed with powdered sugar for natural color and flavor.
- Make ahead and store marshmallows in an airtight container at room temperature for up to 3 weeks to keep them fresh and soft.
Serving Suggestions
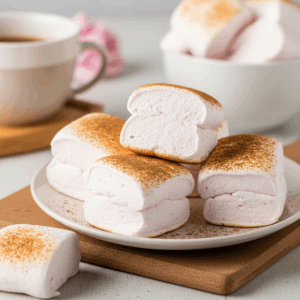
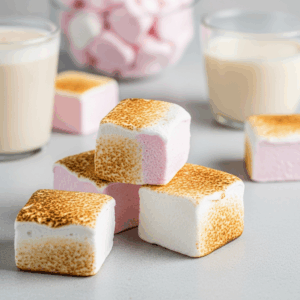
Present your homemade marshmallows elegantly by skewering them onto sticks for roasting over an open flame. Garnish with a sprinkle of edible glitter or crushed peppermint for seasonal charm. For an indulgent treat, sandwich marshmallows between homemade graham crackers and a square of dark chocolate-the classic s’more elevated. Alternatively, drop them into mugs of steaming hot chocolate for a luscious, cozy experience.

Nutritional Details per Marshmallow (approx.)
| Calories | protein (g) | Carbs (g) | Fat (g) |
|---|---|---|---|
| 50 | 0.2 | 13 | 0 |
For more inspiration on using gelatin in desserts, check out our No-Bake Gelatin Desserts guide. To better understand the chemistry behind sugar stages, visit Exploratorium’s Candy Science.
Q&A
Q&A: Homemade Marshmallows: Irresistibly Fluffy & Sweet, The Art Explained
Q1: What makes homemade marshmallows different from store-bought ones?
A1: Homemade marshmallows carry a charm and texture that mass-produced versions can’t quite replicate. They’re fluffier, less dense, and can be customized with unique flavors, colors, and even shapes. plus, without preservatives and artificial additives, they offer a fresher, purer sweetness that melts in your mouth like a cloud.
Q2: What’s the secret to achieving the perfect fluffy texture?
A2: The magic lies in the chemistry of gelatin and sugar syrup. Blooming gelatin gently hydrates the powder, which then sets the marshmallow’s structure. Meanwhile, the sugar syrup-boiled to just the right temperature-creates that bittersweet backbone. When you whip the two together at the right speed and duration, you trap air bubbles that give marshmallows their iconic pillowy lightness.
Q3: Can anyone make marshmallows at home without fancy equipment?
A3: Absolutely! While a candy thermometer and a stand mixer make the process smoother, a handheld electric mixer and a reliable thermometer work just as well. Patience is key: carefully heating the sugar syrup and whipping the mixture until it thickens can be a satisfying kitchen adventure that anyone can master.
Q4: How can homemade marshmallows be customized?
A4: The sky’s the limit! Infuse the sugar syrup with vanilla beans, fresh herbs like lavender, or zesty citrus peel during cooking. Swirl in melted chocolate or fold in crushed candy canes for holiday cheer. You can even experiment with natural food colorings-from beet juice for pink to spirulina for a pale green-transforming each batch into an edible work of art.
Q5: what are some common pitfalls to avoid?
A5: Overcooking the sugar syrup can make marshmallows too hard and brittle, while undercooking yields a sticky, soupy mess. Not blooming the gelatin properly can lead to a gummy texture. Also, rushing the whipping stage or adding gelatin too hot may deflate your mixture, so steady hands and timing are essential.
Q6: How should homemade marshmallows be stored?
A6: Keep them in an airtight container at room temperature, dusted lightly with powdered sugar or cornstarch to prevent sticking. They’ll maintain their fluffy goodness for up to two weeks-though in many kitchens, they rarely last that long!
Q7: Why is making marshmallows considered an art form?
A7: Beyond the recipe, making marshmallows is about mastering balance: the precise heat of the sugar, the perfect bloom of gelatin, the rhythmic folding of sweetness into air. It’s a sensory experience-watching a simple syrup transform into a glossy cloud, smelling the sweet vanilla, feeling the pillowy texture develop under your whisk. Each batch is a little edible sculpture, crafted with care, patience, and imagination.
Key Takeaways
As the final billows of powdered sugar settle and the last marshmallow is pulled from the pan, it becomes clear that making these fluffy delights is more than just a recipe-it’s a craft, a little bit of magic captured in each delicate bite. From the careful melting of sugar to the gentle folding of gelatin, every step is an artful dance that transforms simple ingredients into pillowy clouds of sweetness. Whether you’re a seasoned confectioner or a curious beginner, making homemade marshmallows invites you into a world where patience meets creativity, rewarding you with treats as delightful to make as they are to enjoy. With a little know-how and love, the perfect marshmallow is just a whisk away.