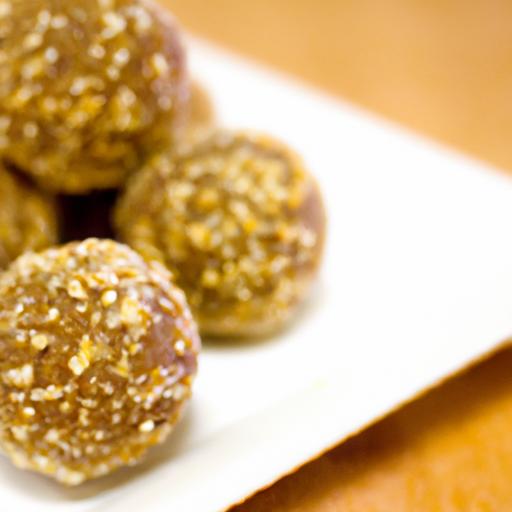
There’s something irresistibly charming about a bite-sized treat that combines rich, nutty flavors with effortless planning.Enter the delightful world of peanut butter balls-a no-bake snack that transforms simple pantry ingredients into little bundles of joy. Whether you’re craving a speedy energy boost, looking for a crowd-pleasing party nibble, or just want a wholesome sweet fix, thes tasty peanut butter balls are your go-to recipe. In this article, we’ll explore how to whip up these tasty morsels with ease, proving that sometimes the best snacks require no oven, no fuss, and just a handful of everyday ingredients.
Delicious Peanut Butter Balls are the ultimate no-fuss treat that blends creamy peanut butter with just the right hint of sweetness and a satisfying crunch. These bite-sized delights are perfect for any time you crave a quick snack or want to impress guests with minimal effort. Rooted in classic American snack traditions yet versatile enough for endless creativity, these no-bake treasures owe their charm to simple, quality ingredients that come together quickly-making them a favourite among busy home cooks and snack enthusiasts alike.
Prep and cook time
- Preparation: 10 minutes
- Setting Time: 30 minutes (no baking required)
- Total Time: 40 minutes
Yield
- Approximately 24 peanut butter balls
Difficulty Level
- Easy – Perfect for beginners and quick snack prep
Ingredients
- 1 cup creamy peanut butter – smooth and fresh for optimal flavor
- 1 cup powdered sugar – sifted to avoid lumps
- 1 1/2 cups crispy rice cereal – for that irresistible crunch
- 1/2 cup semi-sweet chocolate chips – for coating or drizzling (optional)
- 1 tablespoon unsalted butter – adds silkiness to the coating
- 1 teaspoon vanilla extract – enhances depth of flavor
- Pinch of salt – balances sweetness and enriches peanut butter taste
Step-by-Step Instructions
- Prepare the mixture: In a large mixing bowl, combine creamy peanut butter, powdered sugar, and vanilla extract. Stir gently until smooth and fully incorporated, creating a silky base.
- Fold in crunch: Gently mix in the crispy rice cereal and a pinch of salt. Use a spatula to preserve the cereal’s texture and ensure even distribution without crushing it.
- Shape the balls: Scoop generous tablespoons of the mixture and roll into perfect spheres between your palms.If the mixture feels sticky, refrigerate for 5 minutes before rolling.
- Chill to set: Place the peanut butter balls on a parchment-lined tray and refrigerate for at least 30 minutes to firm up.
- (Optional) Chocolate coating: while the balls chill, melt chocolate chips and unsalted butter together in a microwave-safe bowl, heating in 20-second intervals and stirring until smooth.
- Dip or drizzle: Dip each ball into the melted chocolate or drizzle the chocolate over the top using a fork.Return coated balls to parchment and refrigerate until chocolate hardens, about 15 minutes.
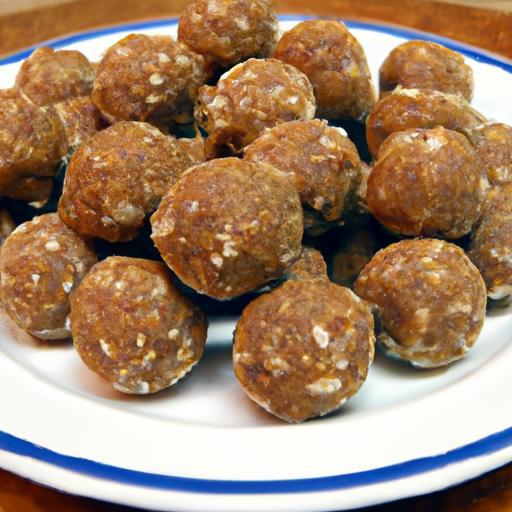
- Ready to serve: Once set, transfer peanut butter balls to a serving platter and enjoy immediately or store properly.
Tips for Customizing Flavors and Textures to Suit Your Taste
- Swap cereals: Replace crisp rice cereal with crushed graham crackers or finely chopped nuts for different textures.
- Add mix-ins: Stir in mini chocolate chips, raisins, or dried cranberries into the peanut butter batter for bursts of flavor.
- Use natural peanut butter: Opt for no-sugar-added, natural peanut butter for a healthier and more robust peanut flavor.
- Spice it up: Add a pinch of cinnamon or cayenne pepper to infuse warmth and a subtle kick.
- Sweetener alternatives: Substitute powdered sugar with coconut sugar or powdered monk fruit sweetener for dietary preferences.
Creative Serving Suggestions and Storage Hacks for Lasting freshness
Present these treat-sized peanut butter delights elegantly on a rustic wooden board or a sleek porcelain platter, garnished with crushed peanuts or a light dusting of cocoa powder for an eye-catching contrast. For parties,arrange them in mini cupcake liners to add color and convenience.
Store your peanut butter balls in an airtight container lined with parchment paper.Keep them refrigerated for up to 2 weeks or freeze individual balls separated by parchment for up to 3 months. Defrost at room temperature for 10-15 minutes before serving to revive their creamy texture.
For extra flair, serve alongside a small bowl of honey or fruit compote for dipping, or pair with a chilled glass of milk or your favorite coffee blend to complement the rich, nutty flavors perfectly.
Nutritional Information (per ball)
| Calories | Protein (g) | Carbs (g) | Fat (g) |
|---|---|---|---|
| 120 | 4 | 10 | 8 |

for more easy no-bake snack ideas, check out our collection of no-bake chocolate recipes. To explore the health benefits of peanuts and peanut butter, visit Healthline’s detailed guide.
Q&A
Q&A: delicious Peanut Butter Balls – Easy No-Bake snack Recipe
Q1: What makes peanut butter balls such a popular snack?
A: Peanut butter balls are the perfect blend of creamy, sweet, and slightly salty flavors. Their no-bake nature means you can whip them up quickly without heating up your kitchen, making them an ideal snack for busy days or last-minute cravings. Plus, they’re bite-sized energy bombs packed with protein and healthy fats!
Q2: What are the basic ingredients needed to make peanut butter balls?
A: The classic peanut butter ball recipe calls for just a few pantry staples: creamy peanut butter, powdered sugar, and butter. Some recipes also add crushed graham crackers or oats for extra texture. once mixed, they’re often rolled in chocolate or dipped for an irresistible finish.
Q3: Can I customize peanut butter balls to suit dietary preferences?
A: Absolutely! For a vegan version, swap butter for coconut oil or vegan butter, and use a dairy-free chocolate for coating. To make them gluten-free,ensure any added ingredients like graham crackers are gluten-free or substitute with oats or crushed nuts. The recipe is wonderfully flexible!
Q4: How do I achieve the perfect texture?
A: The key is balancing the peanut butter and powdered sugar ratios. Too much peanut butter makes the mixture sticky, while too much sugar makes it crumbly. Start by combining equal parts peanut butter and powdered sugar, then adjust slightly to reach a dough that holds shape when rolled into balls.
Q5: What’s the best way to store peanut butter balls?
A: Store them in an airtight container in the refrigerator, where they’ll stay fresh and firm for up to two weeks.For longer storage, freeze them in a single layer on a baking sheet before transferring to a freezer-safe container – just thaw for a few minutes before enjoying.
Q6: Can kids get involved in making peanut butter balls?
A: Definitely! These no-bake treats are perfect for little helpers who can stir, roll, and decorate the balls. It’s a fun, hands-on activity that also introduces kids to basic cooking skills without any risk of stove or oven burns.
Q7: Are there any fun variations to try with peanut butter balls?
A: Oh yes! Mix things up with add-ins like mini chocolate chips, chopped nuts, or dried fruit inside the dough. Coat the balls in cocoa powder, shredded coconut, or crushed pretzels for different textures. For a festive touch, sprinkle colored sugar or edible glitter on top during holidays.
Q8: How do peanut butter balls fit into a balanced diet?
A: While deliciously indulgent, peanut butter balls offer a good dose of protein and healthy fats, which can help keep you satiated between meals.Enjoy them as an occasional treat or an energy-boosting snack during active days, but remember to savor them mindfully due to their sugar content.
Whether you’re a peanut butter lover or a curious snacker, these simple no-bake peanut butter balls are a delightful way to satisfy your sweet tooth with minimal fuss and maximum flavor!
Final Thoughts
With their perfect blend of creamy peanut butter, sweet touches, and a satisfying texture, these no-bake peanut butter balls are more than just a snack-they’re a little bite of homemade happiness.Whether you’re rushing out the door or craving a guilt-free treat, this easy recipe promises delicious results every time. So next time hunger strikes,skip the processed options and whip up a batch that’s as simple to make as it is indeed delightful to enjoy. Your taste buds-and your schedule-will thank you!